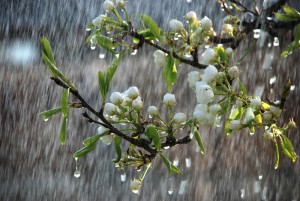
 Where’s the rain when you need it? Figures, as soon as we decided to discuss rain, it went away! Okay, so maybe it won’t rain for a while in Texas now that the weather seems to have taken a turn for the better. But we are still going to finish imparting our knowledge about photographing rain, so that when it does finally rain again, you can take advantage of it!
Time to Delve Deeper Into…
Lighting Conditions: Don’t shoot directly into the light. It is best to shoot rain when it is lit from the side and has a dark background.
Flash: Using flash at a very low power adds a slight glimmer to the rain drops and can result in a very appealing effect.
Shutter Speed: I think we all know that rain moves fast. Therefore, we suggest starting out with a shutter speed of 1/60 to see how much blur it causes. If there is too much blur, increase your shutter speed. If you would like more blur, reduce your shutter speed.
Aperture: Start somewhere with your aperture around f/8 and then you can work your way from there to determine what type of focus you desire.
ISO: Photographing rain requires slow shutter, therefore we recommend shooting at ISO 100.
Focal Length: Experiment with different focal lengths depending on what you are envisioning for your finished product. For instance, to magnify the rain drops, or compress the scene, a longer focal length is required.
Shooting Mode: Shooting in manual mode can provide more predictable results. There is a lot of unpredictability when shooting rain such as low, uneven lighting. When shooting rain, the goal is not to capture a perfectly exposed picture, but to capture the mood. This can be done by over– or underexposing your image.
ABOUT YOUR DALLAS, TX, PROFESSIONAL PHOTOGRAPHER:
Doug Davis has been producing professional, engaging videos and product, food, and lifestyle photography from his Dallas, TX, studio for more than 20 years. D-Squared Studios is located at 4312 Elm Street, Dallas, Texas, 75226. Contact our office at (214) 746-6336 or email Doug at doug.davis@d2studios.net.
